
Tiling a swimming pool is one of the most effective ways to create a long-lasting, waterproof, and visually appealing finish. Whether it’s a residential backyard pool or a commercial project, proper tile installation is critical for durability, safety, and aesthetics.
In this guide, we’ll walk through the professional process of tiling a pool, key materials, and expert tips to ensure high-quality results.
Why Choose Tile for a Swimming Pool?
Pool tiles are not just about looks—they serve important functional purposes:
Water resistance – Properly installed tile prevents water penetration
Durability – Resistant to chemicals, UV rays, and temperature changes
Easy maintenance – Smooth surfaces are easier to clean
Design flexibility – Endless styles, colors, and patterns
Types of Pool Tiles
Choosing the right tile is the first step toward a successful project.
- Porcelain Tiles
Highly durable and non-porous
Ideal for cold climates like Canada
Slip-resistant options available - Glass Mosaic Tiles
Popular for luxury pools
Reflect light beautifully
Excellent for curved surfaces - Natural Stone (less common for full pools)
Used mainly for pool edges or coping
Requires sealing and maintenance
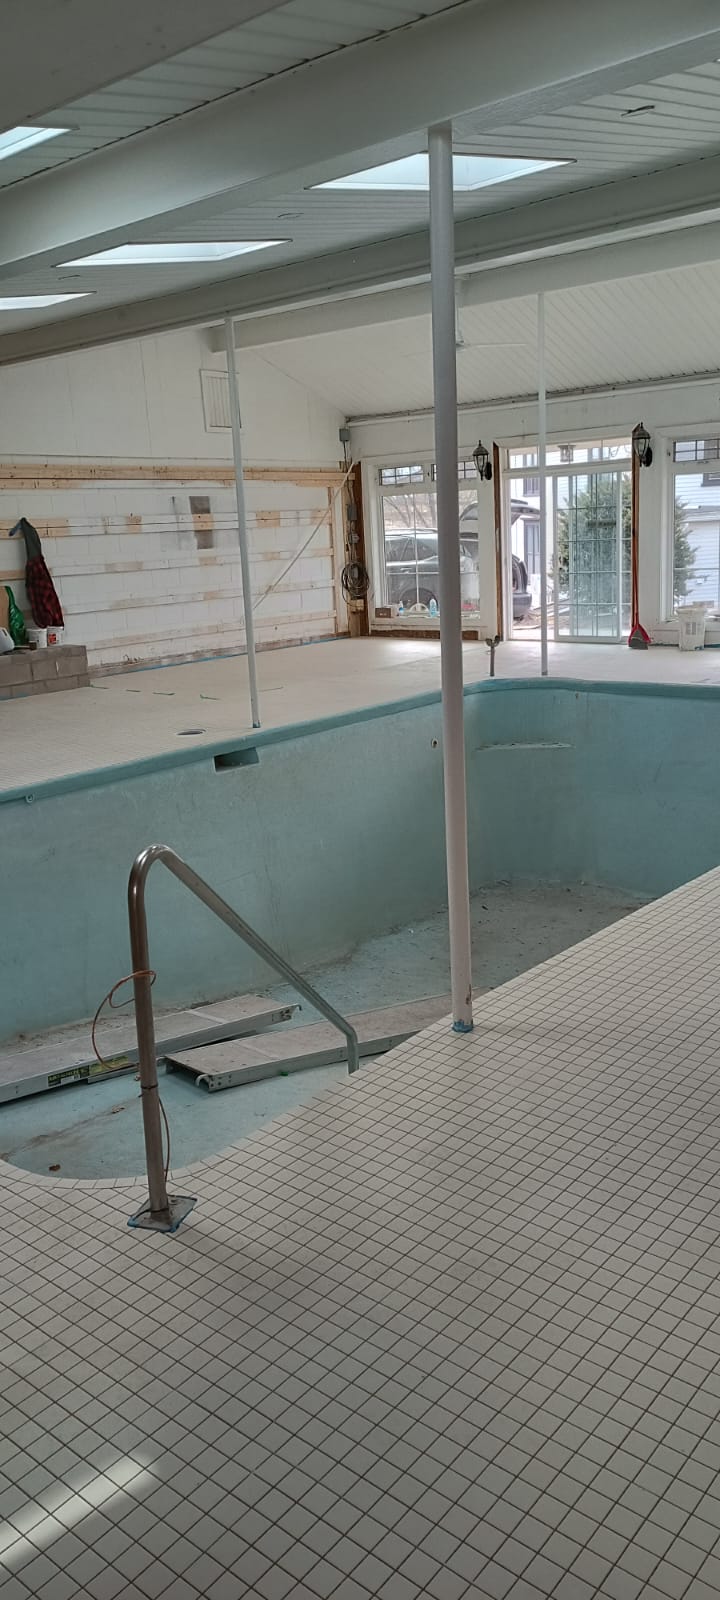
Step-by-Step Pool Tiling Process - Surface Preparation
The foundation is everything.
Ensure the concrete shell is fully cured
Clean the surface from dust, oils, and debris
Repair cracks or uneven areas
Apply a waterproofing membrane
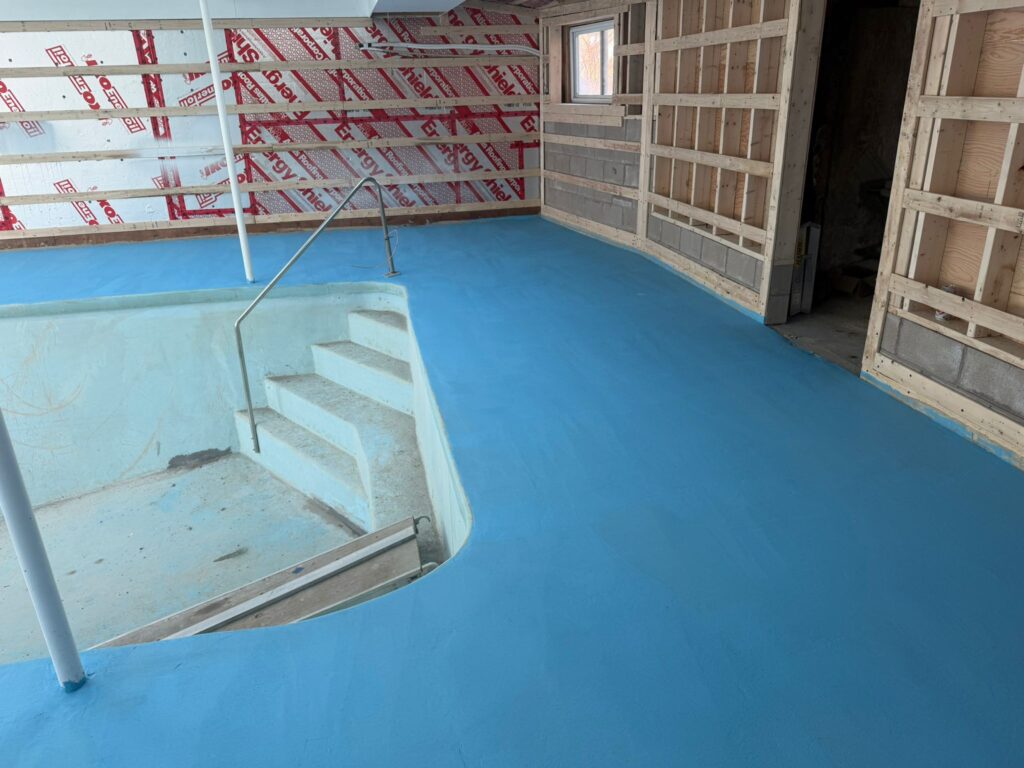
👉 Skipping proper prep can lead to tile failure later. - Waterproofing
Waterproofing is critical for long-term performance.
Use a high-quality waterproof membrane
Apply evenly across the entire surface
Pay special attention to corners and joints - Layout Planning
Before installing tiles:
Plan tile placement to avoid small cuts
Align patterns carefully
Mark reference lines
This step ensures a clean, professional finish. - Tile Installation
Use pool-grade thin-set mortar (waterproof and flexible)
Apply adhesive evenly with a notched trowel
Press tiles firmly into place
Work in small sections to maintain consistency
For mosaics, sheets help maintain spacing and speed up installation. - Grouting
Once tiles are set:
Use epoxy grout (highly recommended for pools)
It resists water, stains, and chemicals
Fill all joints completely
Clean excess grout immediately - Curing and Final Inspection
Allow proper curing time (usually several days)
Inspect for hollow spots or loose tiles
Clean and polish the surface
Only after full curing should the pool be filled with water.
Common Mistakes to Avoid
❌ Using indoor tile adhesive
❌ Skipping waterproofing
❌ Poor surface leveling
❌ Using standard grout instead of epoxy
❌ Rushing curing time
Tips from Professionals
Always use materials specifically designed for pools
Consider expansion joints for large pools
Work with experienced installers for complex designs
In colder climates, choose frost-resistant tiles
When to Hire Professionals
Pool tiling is a specialized job. You should consider hiring experts if:
The pool has complex shapes or curves
You want high-end mosaic designs
You need guaranteed waterproofing
You’re working on a commercial project
Professional installers ensure durability, precision, and long-term savings.
Final Thoughts
Tiling a swimming pool requires precision, proper materials, and technical expertise. When done correctly, it creates a stunning and durable finish that lasts for decades.
If you’re planning a pool project and want reliable, high-quality results, working with experienced tile professionals is the best investment.